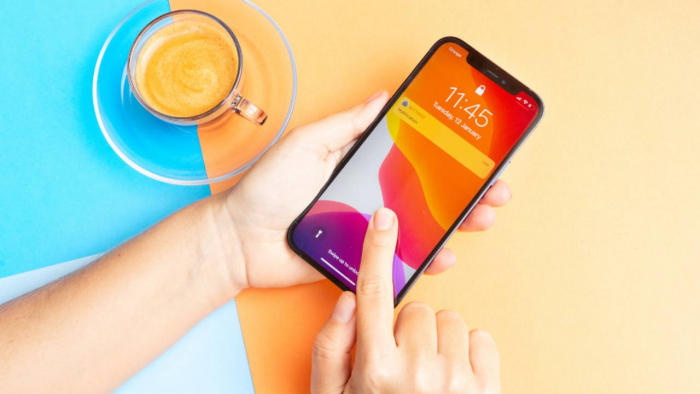
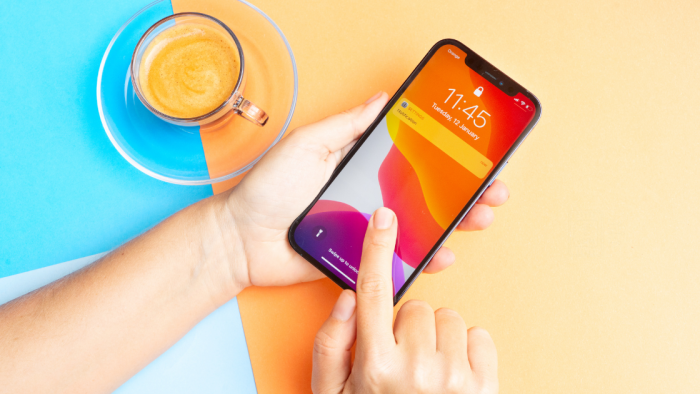
The digital revolution has transformed how we connect our phones to cellular networks, with eSIM technology leading the charge. Unlike physical SIM cards that can be lost or damaged, eSIMs are built directly into your device, offering convenience especially when traveling or switching carriers. By 2030, almost 70% of all phones are expected to support eSIM technology, making it essential to understand the setup process.
If you've recently purchased a new iPhone or are considering upgrading, this guide will walk you through everything you need to know about eSIM installation iPhone, from compatibility checking to troubleshooting common issues.
Before diving into the installation process, it's crucial to verify if your iPhone supports eSIM technology. Apple has been steadily expanding eSIM capabilities across its lineup.
eSIM installation iPhone begins with confirming your model supports this technology. Compatible models include:
Apple has removed physical SIM trays entirely from iPhone 14 models sold in the US, pushing users to how to transfer sim card to esim as part of their transition to newer devices. This shift makes understanding eSIM setup more important than ever for US customers.
US models of iPhone 14 and newer no longer include physical SIM slots, functioning exclusively with eSIM technology. These devices can store multiple eSIM profiles simultaneously.
To activate eSIM iPhone, you'll need your device's EID (embedded SIM identifier):
1. Go to Settings > General > About
2. Scroll down to find the EID number
3. Note this number as carriers may request it
Checking if your iPhone is properly unlocked is also essential, as carrier-locked devices may restrict eSIM functionality with other providers.
Before you begin setting up eSIM iPhone, gather everything needed for a smooth installation experience. A few minutes of preparation can save hours of troubleshooting later.
A stable Wi-Fi connection is strongly recommended for eSIM installation. While cellular data can work, Wi-Fi provides a more reliable connection during the download and activation process.
Your iPhone should be running iOS 12.1 or later to support basic eSIM functionality. For the newest installation methods like Universal Links (discussed below), iOS 17.4 or newer is required.
Have ready:
Backing up your iPhone via iCloud or computer before making any SIM changes is always a good precaution, though eSIM installation rarely affects existing data. Now that you're prepared, let's explore the three main methods to install an eSIM on your iPhone.
How to use eSIM iPhone varies slightly depending on which installation method works best for your situation. Let's walk through each approach.
The newest and simplest way to activate eSIM iPhone is through Apple Universal Links, available on iOS 17.4 and later. When your carrier provides a Universal Link (typically via email or their app), simply:
1. Tap the link on your iPhone
2. Follow the automatic prompts that appear
3. Confirm installation when asked
This method eliminates the need for scanning codes or typing information manually. If the link doesn't work automatically, try opening it in Safari rather than other apps. While Universal Links offer the most streamlined setup experience, QR codes remain widely used by carriers worldwide.
QR code installation is the most common method for eSIM installation iPhone:
1. Open Settings on your iPhone
2. Tap either Cellular or Mobile Data (depending on your region)
3. Select "Add Cellular Plan" or "Add eSIM"
4. Use your iPhone camera to scan the QR code
5. Follow on-screen instructions to complete setup
If your camera can't read the QR code, ensure good lighting and that the code is fully visible. Some users may need to tap "Enter Details Manually" if scanning repeatedly fails. For situations without a QR code, manual installation provides a reliable alternative.
When you can't scan a QR code or prefer manual input:
1. Go to Settings > Cellular/Mobile Data > Add Cellular Plan
2. Tap "Enter Details Manually"
3. Input the SM-DP+ address provided by your carrier
4. Enter the activation code when prompted
5. Complete verification steps as requested
Double-check all entered information, as even small typos can prevent successful setting up eSIM iPhone. With your eSIM installed through one of these methods, it's time to activate and configure it.
Installing the eSIM profile is only the first step—you'll need to activate it to start using your cellular service.
Different carriers have varying activation procedures:
After installation, your iPhone will typically show "Cellular Plan Ready" or similar messaging if activation is successful.
If you're using multiple lines (physical SIM + eSIM or dual eSIMs):
1. Go to Settings > Cellular/Mobile
2. Tap "Cellular Plans"
3. Select your default line for calls, messages, and data
Make sure to label your eSIMs descriptively (like "Work" or "Travel") for easy identification when switching between them. Testing your connection by making a call, sending a text, and checking data access confirms your eSIM installation iPhone was successful.
Modern iPhones can handle multiple eSIM profiles, making them ideal for separating personal and work lines or for frequent travelers.
To toggle between active eSIM profiles:
1. Go to Settings > Cellular/Mobile
2. Tap the eSIM you want to use
3. Toggle "Turn On This Line" to enable it
4. Optionally, disable other lines to conserve battery
The iPhone 14 can host up to eight eSIMs simultaneously, making it perfect for travelers or those maintaining separate work and personal numbers.
When you activate eSIM iPhone with multiple profiles, proper labeling becomes crucial:
1. Go to Settings > Cellular/Mobile
2. Select the eSIM you want to label
3. Tap "Cellular Plan Label"
4. Choose a preset or create a custom label
This simple step prevents confusion when managing multiple lines. Properly configured eSIMs offer significant battery advantages compared to constantly switching physical SIMs, particularly when traveling internationally. With basic management covered, let's address common issues you might encounter during setup.
Even with perfect preparation, you might run into challenges when learning how to use an eSIM iPhone for the first time.
If your iPhone shows "No Service" after eSIM activation:
1. Toggle Airplane Mode on and off
2. Ensure the eSIM is enabled in Settings > Cellular
3. Check that you're in your carrier's coverage area
4. Restart your iPhone completely
Sometimes, carriers need up to 24 hours to fully activate an eSIM profile in their system.
Common activation errors include:
If problems persist, contacting your carrier's eSIM support team is often the fastest solution.
Now that you're familiar with eSIM setup and troubleshooting, here are answers to common questions about setting up eSIM iPhone.
As iPhone eSIM guide principles evolve, the technology continues to improve with each iOS update. The future looks bright for eSIM users, with expanded carrier support and more streamlined activation processes on the horizon.
The flexibility and convenience of eSIMs represent the future of mobile connectivity. By mastering the installation and activation process now, you're setting yourself up for a simpler, more flexible cellular experience.
Whether you're preparing for international travel or simply upgrading your iPhone, understanding how to activate eSIM iPhone puts you ahead of the curve in mobile technology.
Yes! Most eSIM-compatible iPhones support Dual SIM functionality, allowing you to use both a physical SIM and eSIM (or two eSIMs on newer models) simultaneously. This is perfect for separating work and personal lines or for maintaining your home number while traveling with a local data eSIM.
An iPhone reset or restore will remove all eSIM profiles. If you're planning to reset your device, contact your carriers first to understand their process for reactivating your eSIM profiles afterward. Some carriers provide easy reactivation methods, while others may require issuing a new eSIM.
Newer iPhones (14 and later) can store multiple eSIM profiles and use two simultaneously. This capacity makes eSIM installation iPhone particularly valuable for frequent travelers who need connectivity across different countries without constantly changing physical SIMs.
Be the first to post comment!

Introduction: Why Sales Automation Is No Longer OptionalToday’s B2B sales enviro...
Michael Hicklen1 month ago

Image search has quietly become one of the most powerful discovery, research, an...
Michael Hicklen1 month ago

Why Workflow Automation Matters in 2026Automation tools help businesses:● S...
Michael Hicklen1 month ago

1) Foundations :What software review platforms are-Software review platforms are...
Michael Hicklen1 month ago

1. What AI Automation in Daily Work Actually Means?1.1 AI automation in daily wo...
Michael Hicklen1 month ago
1. What Is a CRM?Definition-A CRM (Customer Relationship Management) system...
Michael Hicklen1 month ago